> A multimeter is an electronic measuring instrument used to measure several electrical values such as voltage (volt), current (Amp), and resistance (ohm). It is also called DMM (Digital Multimeter).
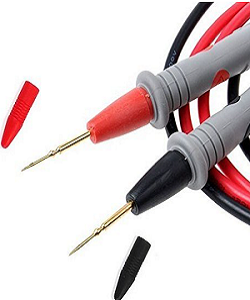
> A typical multimeter has two probes, a red one and a black one, that can be connected to a circuit or a device to measure the electrical values. The meter can measure DC (Direct Current) voltage, AC (Alternating Current) voltage, DC current, AC current, resistance, and continuity.
> Multimeters come in both analog and digital formats. Analog multimeters have a needle that moves along a scale to indicate the value, while digital multimeters have a digital display that shows the measured value. Digital multimeters are more popular because they are easier to use, read and provide more precise readings.
> Multimeters are used in various applications, including chiplevel notherboard testing and troubleshooting repairs. They are essential tools for diagnosing different motherboard faults such as dead motherboard, no display or on-off failure and circuit voltage testing can be done as per schematic diagram.
Steps to use a digital multimeter:
> STEP-1Familiarize yourself with the multimeter: Before using a digital multimeter, you need to familiarize yourself with the different parts of the device, including the dial, display screen, and probes. Make sure you read the instruction manual that came with the multimeter to fully understand its features and how to use it.
> STEP-2Set the dial to the appropriate measurement mode: The dial on a digital multimeter allows you to select the type of measurement you want to make. For example, you might select the DC voltage mode, the AC voltage mode, the resistance mode, or the current mode.
> STEP-3 Connect the probes: The probes are the two wires that come with the multimeter. One probe is usually black, and the other is red. Connect the black probe to the negative (-) port on the multimeter, and the red probe to the positive (+) port.
> STEP-4Test the device or circuit: To test a device or circuit, touch the probes to the appropriate points. For example, to measure voltage, touch the probes to the positive and negative terminals of the device or circuit. To measure resistance, touch the probes to the ends of the resistor.
> STEP-5Read the display: The multimeter display will show the measurement you are making. Make sure you are reading the correct units for the measurement mode you selected on the dial.
Turn off the multimeter: When you are finished using the multimeter, turn it off to conserve battery life.
Note: Always follow the safety precautions when using a multimeter, such as wearing protective gloves and avoiding high voltage areas.
Usefull Links
Disclaimer: We are not authorized service center of hp dell acer Lenovo and apple we only repair/sell out of warranty laptop and use 100% compatible parts.
All product names, logos, brands, trademarks and registered trademarks are property of their respective owners!!!
.png)